I have not posted for some time, and that is because I undertook a couple of large and complicated woodcut prints. I say large and complicated, because I do not own a press(other than my table top version which holds a max size 8 inches by 10 inches). I am hand printing which adds to the complexity and time. I prepared both of these new prints for an exhibition on printmaking titled Light/Dark. Both these prints are inspired from techniques used in
early works completed about 15+ years ago. Some of these early works were created using a hand held dremel to carve the relief linocut. I am looking back at these old works, and intend to update the look with 2 new prints using punches, awls, and chisels. Here is
"The Collector" and
"The Waterfront," and I am posting notes and details on creating both of these below.
"The Collector," hand printed in 2011 is approx 15x18 and uses 2 woodcut plates(above). "The Waterfront" (below) hand printed in 2011 is approx 20x26 and used 1 woodcut plate. I used virtually the same carving techniques for both prints, but each had different visual goal.
The main goal for each print was to show off the carving techniques used with a variety of punches, awls and Japanese chisels. When printing the goal is to show off the multitude of color in "The Collector," and the variety of tonal values in "The Waterfront."
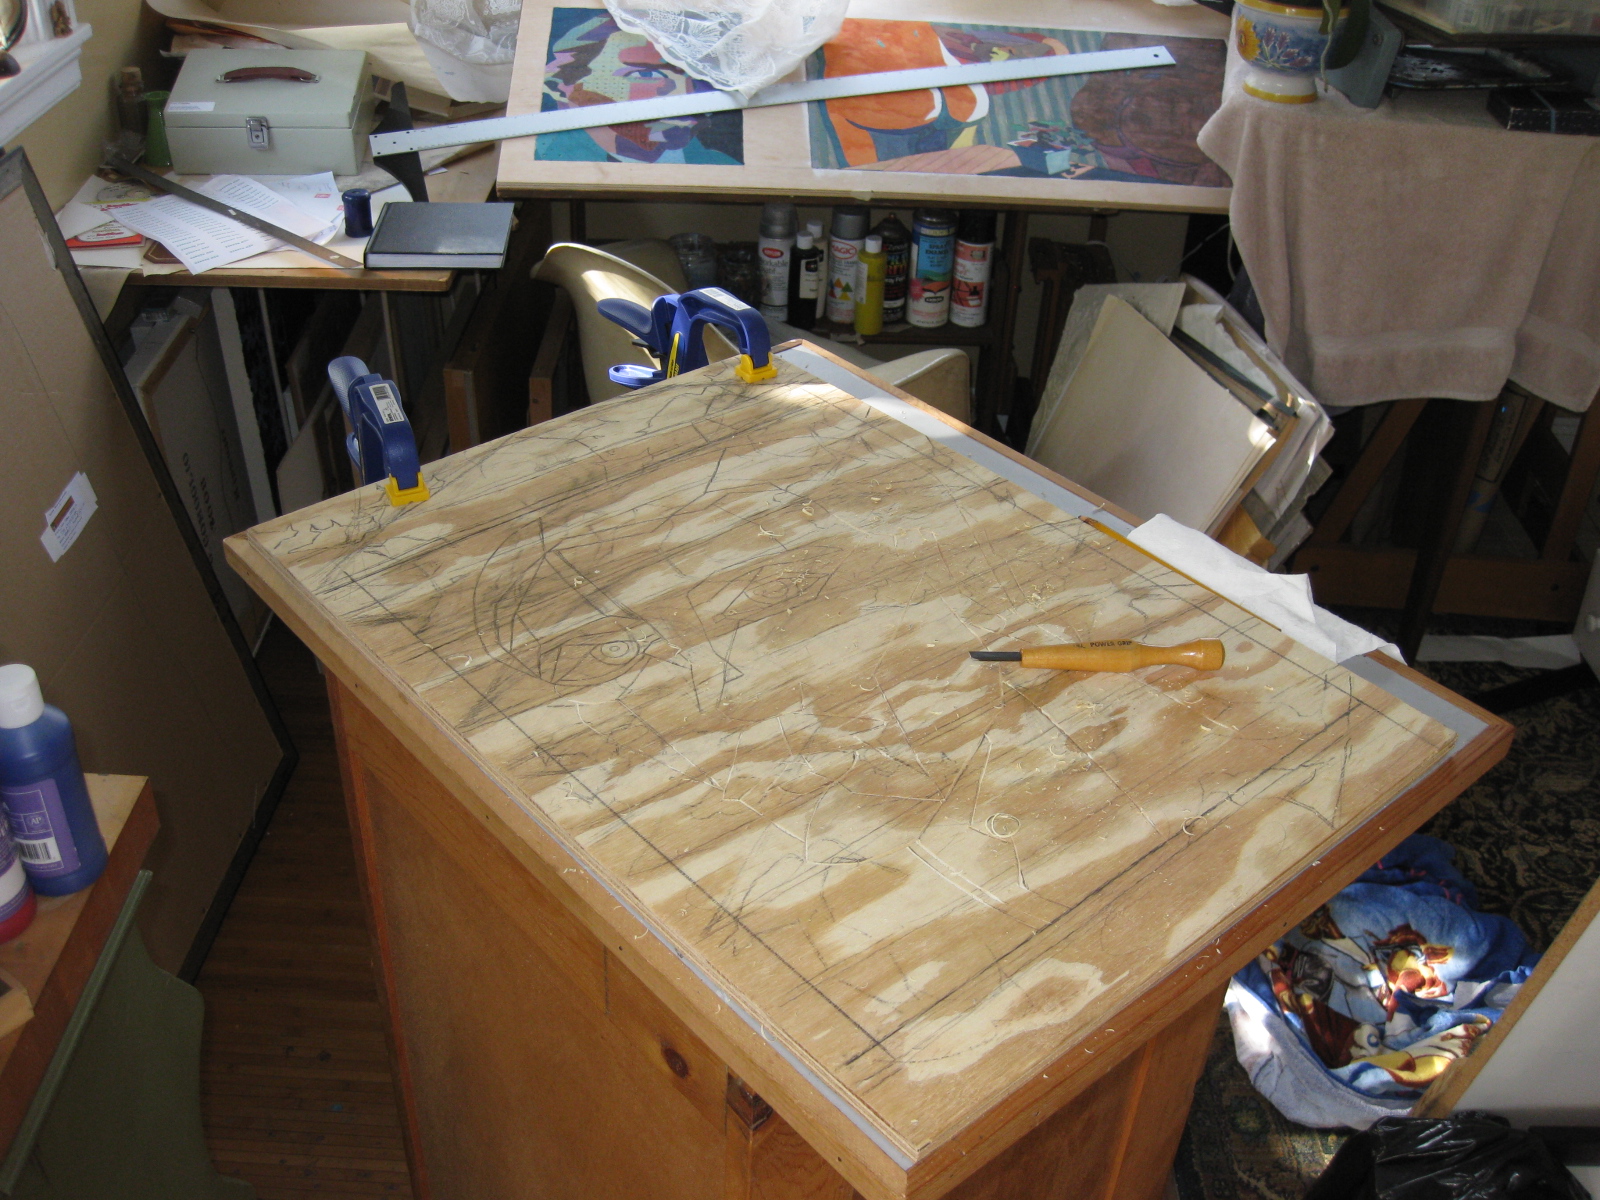
"The Collector," uses 2 plates as shown below, in sequentially carved order. Here is my basic setup: I am using found plywood, not very high quality, and not recommended for ease of carving. I clamp my plywood plank to my workstation. The cutting is extremely difficult on low grade plywood. It is heavily grained, so each time I'm cutting in a soft, light area the cutting blade on the chisel digs into the wood deeply, then as you are cutting into the dark grain the chisel feels the hard wood and stops you from making any sort of smooth cut. So there are a lot of chisel skip marks(or unintended cuts), and cuts through the dark grain areas were cut twice to even the look. This wood is also hard to cut when you are close to a knot, or working against the grain. My suggestion is to get a clear(of knots) and finished plywood as I use on all my woodcuts now.
"The Collector," (above: setup, below: plate 1 carving completed)
In the image above, the plate is carved to simple lines, as this plate will be printed in a doctored version of the White Line print method. Below is plate 2, and in the first stages of completing the carving. In this early version you can see the areas that have already been "punched" with the variety of tools. The design is the exact same as plate 1, and careful registration of the design on both plates is crucial for a successful print. (see earlier blogs on registration techniques)

Above, on plate 2, I am adding additional cutting/carving around the punch marks to give a unique look when both plates are printed. Below, additional progress is being made in both carving and punch marks. What I am concentrating on is making a variety of abstract patterns within each area of the drawing, and trying not to repeat the same pattern. I use the pre-drawn grid on my plate to line up where I want the punch marks to go. I allow for a lot of leeway in the punches and awls. By this, I mean that I am not focusing on being exact with every punch mark since I know that is impossible.
This is impossible because of the grain, soft, and hard areas in the wood. I also don't want to be exact, I want to change the force of the hammer as it strikes the punch. I want the finished work to show a hand made creation. Basically, this is a woodcut, so I am treating it for its natural properties and not trying to force something out of it which I know it won't provide.
Above, you can see a build up of waste that has been carved away by the chisels, the progress to different areas, and some of the tools. My thoughts are in the printing, and making every attempt to gain a wide variety of colors and textures through the carving method used. In the below image you can see a detailed photo of how each space has been treated differently.
The plate is near completion(above), and completed(below). After I have all my carving done, I paint a thin layer of watered down
gesso. I specify "thin," because I do not want to fill in any of the finely carved details.
I'm looking forward to printing this work and all that needs to be calculated is the color choices. When I begin the printing, I am hinging my paper to my woodcut plate on my registration marks. I am hand painting(with waterbase printmaking ink) directly onto plate 1 in various areas, and then printing hand printing them one space, and one color at a time. the photo below shows this method after being repeated about 30 times.

Yes, this is a very slow and time consuming process, and I often print for a few hours and leave it to the next day. The time involved in printing, "The Collector," is about 15-20 hours to get one copy.
The print above shows printing of plate 1 is near completed. and the print below is the first photo I have where I have started printing plate 2.
When printing plate 2, I can clearly see how the overlapping of the printed textures is going to make the color choices crucial for the carved areas to pop out of the overall image.
My focus is to make a print with a strong raked light coming from the back left portion of the print.
The print above is the completed first print from the 2 plates. The top image of this blog is the second printed copy. Below is how the blocks look after the first printing.
(Plate 1 above, Plate 2 below) What I want to show here is the way these blocks have been carved to support the White Line printing method. This method allows for direct painting to the plate. You can see how each space is separated by color, and gives the unique look of the final piece.


No comments:
Post a Comment